In Part 1 of this series, we have dived a bit into the risk framework that is avalanche safety. The main message has been: get educated, otherwise, everything else you do or buy is quite useless. That still remains the case.
In the meantime, let’s talk about gear. Three items are an absolute must when you venture off into uncontrolled terrain: avalanche transceiver, probe, and shovel. Over the past decade or so, the avalanche airbag has become more of a standard also. But I believe it is still less of a must-have than the transceiver, probe, and shovel. I will explain why, as we get into the purpose of each of these pieces of kit.
Reading this article is a good start on how to work with these items. But it’s useless if you haven’t followed real avalanche safety training and haven’t practiced with them in the snow. Please bear in mind that this article is by no means a substitute for an avalanche course or practice session.
Remember: I am not an avalanche safety professional. This piece has been reviewed by those who are.
Avalanche Airbag
Let’s start with the avalanche airbag. It is an airbag that is in your backpack. When you trigger it, it inflates very quickly, giving you a much larger volume. This can be important when you are in an avalanche. In a flow of snow, bigger pieces tend to stay on top of the smaller pieces. So, being bigger in volume gives you a better chance of staying on top of the avalanche debris. It is not a guarantee, I must emphasize. Nor is it the holy grail of burial prevention. In a terrain trap (a gully, a ditch, a pit, an abrupt transition from a steep slope to a flatter slope) snow can still accumulate on top of you, burying you completely. An avalanche airbag has no use then; a transceiver, probe, and shovel in the hands of a well-practiced freeride buddy might save you, though.

An airbag – or indeed all the gear we talk about in this article – has nothing to do with risk reduction. These are all useful and in some cases, vital tools that you need in case things do go wrong. But they will not prevent things from going wrong. In fact, even with the greatest care in identifying risk, making the right choices, and controlling the human factor in avalanche terrain, there always will be a residual risk. This residual risk is never zero.
It is for this residual risk that we need this safety gear. In case things still go wrong. The airbag is the first thing that may help you in a situation like that. But as explained above, it is no guarantee that you won’t be buried by an avalanche. Being buried is the main killer of avalanches. Studies show that of avalanche fatalities, over 65% of the casualties die from asphyxiation (some studies even say 88%). So, getting people out from under the snow is your best chance of keeping them alive after being caught in an avalanche. And getting people out is why we need the transceiver, probe, and shovel.
Avalanche transceiver
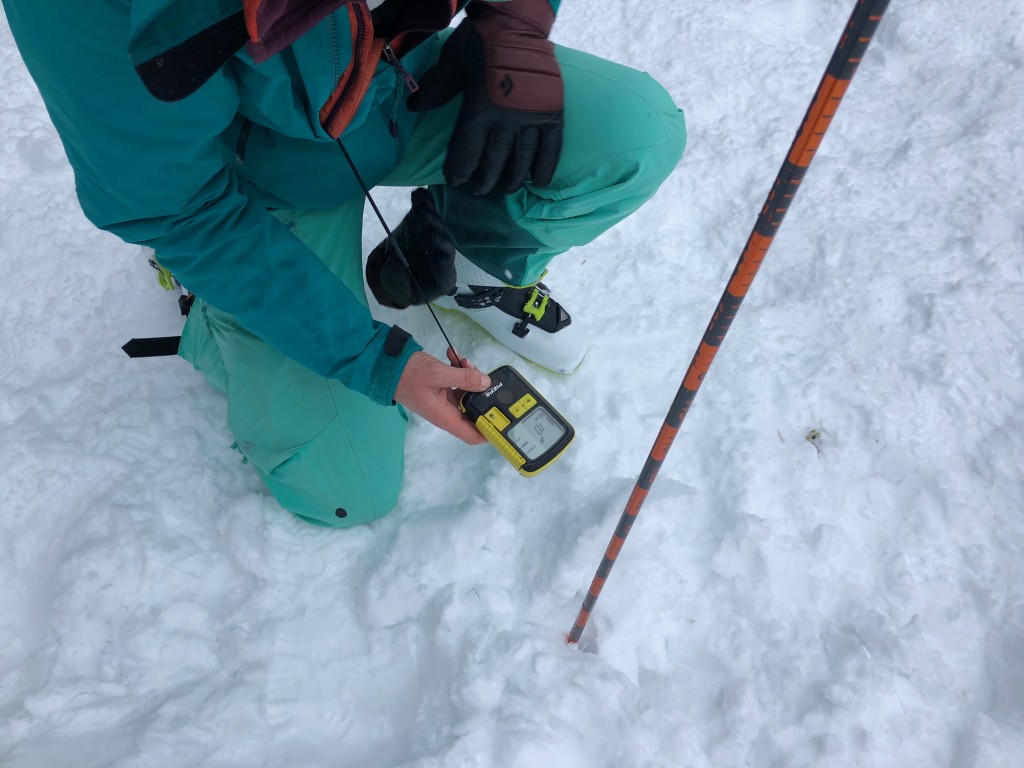
An avalanche transceiver is a battery-powered device that transmits and receives a signal at a certain frequency. It is for finding a person under the snow, or in fact for being found. You carry it on your body (so, not in your backpack!), and while skiing, it is always in ‘send’ mode. It sends out a signal at the 457 kHz frequency. That has been the international standard since 1989. All avalanche transceivers, whatever the brand or model, use that same frequency. This means they are all compatible with each other.
If you get buried in an avalanche, others can switch their devices to ‘search’ mode and their transceivers will pick up the signal your device is sending out. The indicators on their devices will tell them the direction and distance to the device that is sending out the signal. That may sound easy, but it is not as straightforward as it seems. Literally.
Firstly, the range of the signal is limited to 25 meters or so. Secondly, even if your transceiver has picked up a signal, it doesn’t lead you in in a straight line. A transceiver has three antennas (these days they all have three to cover all dimensions – older ones may have just two. Use those as a practice target; don’t go skiing off-piste with it). These antennas act like magnets, making up so-called ‘flux lines’. The searching transceiver will follow these flux lines into the sending transceiver.
These are not straight lines. It takes quite a bit of practice to understand how it works, and how to use your transceiver intuitively and efficiently (time is of the essence in a real avalanche scenario, and not having to think about it helps in stressful situations). So, just buying a transceiver is not enough. Make sure you know it well and that you practice the different search phases and procedures carefully. You need to practice and refresh those skills a few times each season. And another tip: try a few different models. The indicators on the transceiver and the user interface differ a bit from one brand to the next. None of them are bad, but some might connect with you more intuitively than others. This does help.
Probe
A transceiver will get you as close as possible to the buried victim. To pinpoint its exact location, you need to probe the snow. Since digging a victim out is most time and energy-consuming, you want to make sure you’re digging in the right place.
The probing itself is done using a spiral pattern that ensures you don’t miss any spots. It is quite tricky, poking into the snow. Avalanche debris can be very firm and set. To feel the difference between hard chunks of set snow, the ground beneath, or a human body (that’s what you’re aiming for) is not easy. You need some power to get through the different layers, but you have to feel as well. And it’s very tiring too to keep your balance, especially on the uneven surface of an avalanche debris field.
I have been in an avalanche situation once. A big slide had covered a groomed run in Tignes with a thick layer of snow. It was unknown whether or not people were buried. So we assisted snow patrol in these vast probe lines to make sure. Probing is tough. What is it that you feel? Standing up straight is tough too. One second you’re standing on a hard block of snow, the next second you’re sunk into it up to your knees. Make sure you practice probing too.
It is essential that the probe is long enough and that it is strong enough. Victims buried in snow can be quite deep (1 meter, on average). And the snow is very tough, especially if it’s more set and heavy. I have seen lightweight little probes come out all bent and useless. Usually, the longer a probe gets, the thicker and stronger it gets as well. I would recommend a probe of at least 260 cm long. But if weight is not a real concern, go even longer and stronger. Also remember: aluminum can bend; carbon or steel probes are much sturdier.
Shovel
It seems quite obvious what the shovel is for. Once you have located someone buried under the snow, you can dig him out. The larger the blade of the shovel, the bigger the scoops of snow you can shovel away, one might say. But too big a shovel will slow you down. Extensive research has shown that a blade of approximately 575 cm2 is ideal. And make sure this blade is a metal one. There used to be plastic shovels too – not so much anymore, thank God. Snow gets very hard very fast once it sets.
There are some other features too that you might look into. For me, I like a long shaft. It saves my back and gives me more leverage while shoveling (that same research shows 78 cm is ideal for average-sized people). A telescopic shaft fits perfectly in my backpack. Another tip: a square/horizontal top edge of the shovel blade. When you need some extra power driving the blade into hard snow, it is nice if your ski boot doesn’t slide off.

Bottom line
There is a lot more to it than just going online and buying the cheapest set-up you can find. These things have very specific functions. Those functions are always the same, whatever brand or model you decide to buy. But you should understand the purpose of each of these items and find out which works best for you. Because only if you can work efficiently in terms of time and energy, as well as intuitively (you automatically do the right thing, even in stressful situations) – only then are they of use to the girl or guy you’re trying to save.
Recco
A quick afterthought on Recco. It essentially consists of passive reflectors in your clothing and a big scanner that can find those reflectors under the snow. These Recco scanners are available in most big resorts. The problem is that they have to be carried in by the ski patrol or emergency services. And before they arrive at the scene, a lot of time has probably passed. Studies show that after 18 minutes under the snow, chances of survival diminish rapidly. So don’t count on Recco as a fast and stand-by option. You with your transceiver, probe, and shovel (and the knowledge on how to use them) are your buddy’s best chance of getting out alive.
This article has been approved by Snow Safety Center.
0 comments on “Avalanche Safety, part 2: gear” Add yours →